This café racer build isn’t just about building motorcycle. It also about friends, family, and community. Whether it is motorcycles, racer cars, or drinking beer, the experience is always improved in the company of good people. My friend Vaughn Horvath was one of those people and two weeks ago the world lost him. He passed due to complications related to a motorcycle accident. Vaughn wasn’t just a good guy, he was a great guy. We grew up together at the race track and were family as a result. Vaughn was a dear friend and will be missed sorely. To my readers out there, I know many of you are riders and motorcycle enthusiasts, please be careful. Watch out for your friends and stay safe while you have fun. Love your friends and family and protect them when you can.
Now back to your regularly featured motorcycle build. As you may have noticed I took a week off. Unfortunately that was more out of necessity than it was choice. It was time however to get back on the horse again.
I finally finished paint stripping. That includes the frame, swing arm, gas tank, headlight bucket, and head light brackets. As I have stated in earlier posts, the angle grinder with a wire wheel removes paint effortlessly. It’s the nooks and crannies, brackets, and corners that are the hard part though. The angle grinder often can’t reach these parts. The best way to get at these was with aircraft paint stripper. I can honestly say I hate the stuff, it’s downright nasty to work with. I stripped the headlight bucket last, and disappointingly, it came with body filler. There’s not much I can do about it, so I will touch up the filler when I do the tank body filler. There remains some sandblasting. Neither paint stripper nor the wire wheels can properly clean some areas. Frame fabrication will start in November and once that is completed the frame will be prepped for coating. At which point I will do the final sand blasting and surface preparation.
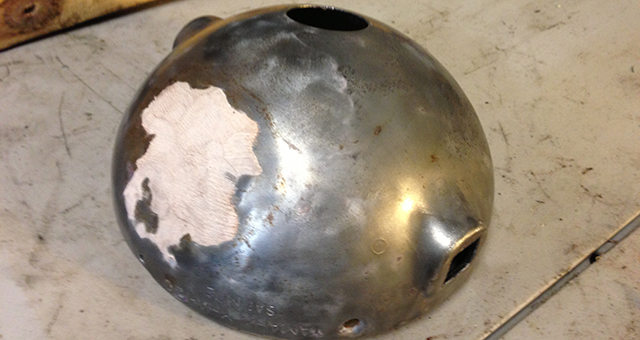
The hubs were fully disassembled during my last post but they needed to be cleaned. First, I gave them a good washing in the mineral spirits over at John Walko Racing. Then I cleaned them with aluminum wheel cleaner and a brush. That got both hubs in pretty nice shape, however some of the depressions were fairly impossible. Ultimately, I had to head over to the media cabinet to blast those nooks and crannies clean. They came out looking pretty nice. Most of the aluminum parts on the bike will have a brushed Aluminum finish. The brushing process cleans parts, finishes them, and produces a look that I like. Achieving a uniform brushed look with wire wheel takes a little practice though. Once I have the aluminum parts all cleaned up I am going clear coat them.
Soon, I will be ordering wheels and spokes. It took weeks of research but I think I finally have the proper combination of wheels and spokes figured out. Fingers crossed. I am going with black anodized wheels and stainless spokes. The aluminum that doesn’t have a brushed finish will be anodized black throughout the bike. This scheme fits nicely with black DG expansion chambers that I have.
My father finished honing the cylinders and they look great. The porting is done as well. They aren’t radical cylinders by any means, but they are an improvement over stock.
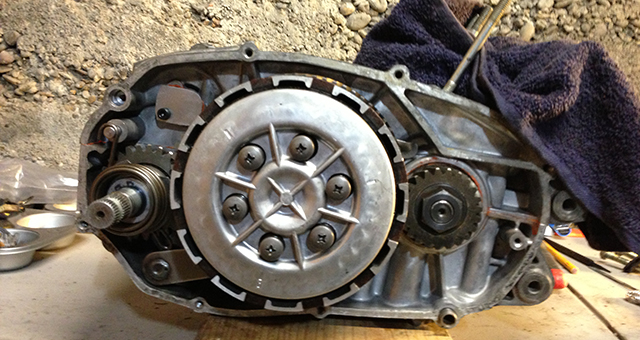
Assembling the clutch was a bit of an adventure. In a previous post I talk about buying a second clutch. As it turns out the original (1974) clutch is a seven disc clutch. The used clutch I purchased on eBay is a six disc clutch. Apparently the change happened between the ’73 and ’74 model years. The seven disc variant is the preferred model as it reduces slipping. It took me a night to figure out why I had an odd number of discs and why some of the discs were drastically thinner than the others. Research pays off on things like this and ultimately that’s how I figured out the situation. Luckily, only the number of discs and the pressure plate vary, the clutch baskets are the same during those years. This meant I ended up with a complete clutch after all.

The clutch fun did not stop there. In the process of having two clutches as well as the host of the other pieces to focus on I managed to misplace the clutch plunger. The clutch plunger is a little “P2” (oddball piece) that goes between the clutch push-rod and the clutch pressure plate. It’s a vital part to say the least. When the clutch lever is pulled the various mechanisms force the clutch plunger up against the pressure plate and this disengages the clutch. Only after giving up hope and purchasing a replacement plunger on eBay did I find my plunger. Sadly, the plunger was properly organized in a zip-lock bag I had labeled “clutch.” That’s my luck for you. After much stress the clutch is fully assembled and I have a spare clutch plunger on its way to boot. The extra plunger is for sale if anybody needs one.
The bottom end is nearly buttoned up, all that’s left is points replacement. I have a plan, and it’s shaping up, but you’ll have to wait for that post as I haven’t sorted all the details yet. To continue making progress I looked at the pistons and heads.
First, the piston rings needed gapped. This is a simple process. Slide the ring into the cylinder, square the ring up in the cylinder by pushing the piston against the ring, remove the piston, measure the gap with feeler gauges, then file the gap appropriately. I repeated this process until the gap was right. Shops that are well equipped will have a ring gap grinder to perform this, but I just used my trusty points file. The caveat being that with an end gap grinder it is a easier to get a square cut on the end of the ring.
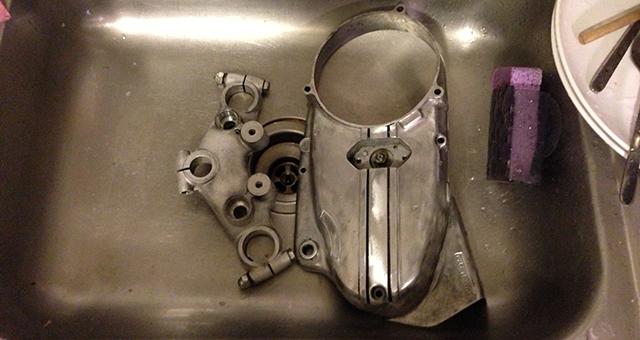
Before mounting the cylinders I wanted to paint them. First I washed the cylinders in the sink using dish soap and water. I let them dry thoroughly before masking the various openings carefully. After masking I cleaned them with denatured alcohol to remove all remaining grease and oil. I painted them with VHT Flameproof Satin clear coat. They look snazzy and I feel confident that the coating will hold up well. I’ll use VHT clear coat on the other pieces as well, but will step down in temperature rating accordingly. Special thanks to my girlfriend, Kaitlyn. She is a good sport even when I’m washing motorcycle parts in our kitchen sink.
After all of this, it was appropriate to mount the pistons on the connecting rods and place the cylinders on the bottom end. I used thick assembly lube on the cylinders before sliding them over the pistons. All that is left of the engine mechanicals is the cylinder head squish. Things are actually going back together now and it feels great!
For my readers who are unaware of what squish is, it is the distance between the outer edge of the piston and the head. Setting squish will effect combustion chamber volume, as well as head temperature. RD350’s have notoriously sloppy squish from the factory and I’m just too picky not to work on it a little. I’ll review the process in next weeks edition as I’ll be wrapping the engine up then.
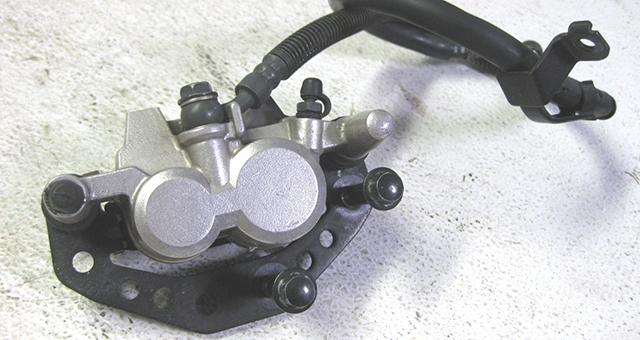
This project requires lots of planning and research. Having committed to doing regular blog posts means that I actually work 2 weeks ahead of the published blog. At two weeks out, I complete research and order parts so that they show up with a one week lead time on the blog post. Then during that week I do the work and write the blog retrospectively as the work is completed. Ultimately that means that sometimes I order parts opportunistically. One such item is this Kawasaki EX500 caliper that I scored for $17.50. The price was right, especially in comparison to the $145 RD350 factory reproductions. You can get an XS650 reproduction that will work for $90, but I like $17.50 better. This caliper is also a huge technology leap. I hope to mate this caliper to my forks and it should provide an interesting post later. As always, stay tuned.
This weeks parts List:
- 50A 1000V 3 Phase Rectifier/Regulator – New – eBay
- Maxima Light Shock Oil – New – eBay
- LED Turn Signals – New – eBay
- 44mm Unipod Filter (2) – New – eBay
- 3/16 I.D. Tygon Fuel Tubing (3feet) – New – eBay
- Billet Bar End Mirrors – New – eBay
- Clutch Plunger – Used – eBay
- EX500 Ninja Front Caliper – Used – eBay
- Denatured Alcohol – New – Home Depot
- Masking Tape – New – Home Depot
- VHT Flameproof Clear – New – Autozone
- Bondo Body Filler – New – Autozone
A word of caution with eBay purchases. Often you get what you pay for, do your research before buying to make sure you get what you think you are getting. For every hour I spend working on my bike, I spend three researching parts and pieces. That’s just an unfortunate reality when you are doing a project like this.
Leave a Reply