With the bike almost completely torn apart I am approaching a different stage in the project. No longer am I focused on disassembly but rather can start fixing, refining, and rebuilding. As I have mentioned before, the engine is first on my list. It obviously is a key piece of equipment on the motorcycle and because it could be one of the most costly pieces of equipment it makes sense to start with it.
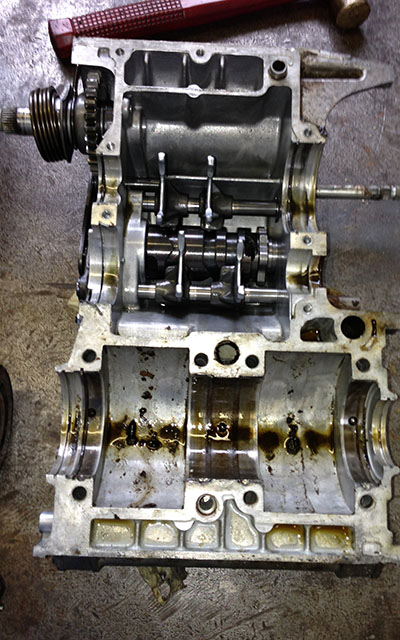
This past week I managed to get the engine cases split which gave me a look into the treasure chest that is an RD bottom end. The crank and rods fortunately appear to be in great shape. The thrust washers show no signs of over heating and the play on the connecting rods is well within specs. There is no rust or any signs of serious degradation either. The amount of crud in the bottom of the crank cases was a little surprising though. Luckily cleaning of the cases was easy thanks to my father’s Kenmore dishwasher.
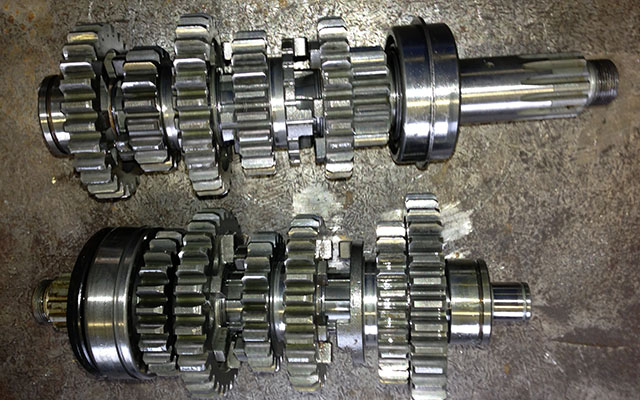
I will be replacing the outside two main bearings and main bearing seals but the rest of the crank assembly will be left as is. This is good news for the project budget, barring any hidden disasters, the extra cash this frees up should allow for aluminum wheels. While the bottom end is apart I also took the time to replace all of the transmission seals and bearings. I was not originally planning on doing this, but I ended up getting new bearings and seals at around 40% of retail cost. The classifieds over at the 2-Stroke World forum hooked me up with that deal.
This week I got the heads cleaned up using the media cabinet over at John Walko Racing. The heads look good and the bead blaster makes short work of the eight-thousand miles worth of carbon build up on the heads. I am planning to do a mild head cut. I’ll have to take into consideration that I’ll be running this on pump gas, meaning I can’t lower the compression race engine levels. Less compression can help bottom end life anyways, so I’m not too worried. Nevertheless, I should be able to coax a little bit more horsepower out of the old girl.
I also took my cylinders to my fathers place and we gave them a very slight hone. Just enough to remove the very slight surface rust that formed on the cylinder surfaces. I am waiting on him to give me a number on the cylinders so that I can order the pistons, but I should be able to do that this week. Porting will begin as well. My father is taking on those duties and he has a few weeks to take care of that. After the porting is completed we will only need to hone each cylinder based on the pistons I have received.

As for the intake, in the past week I also received two Mikuni TM28 flat slide carburetors as well as a full set of YZ125 reed valves. The YZ reeds were recommended by many people as quality replacement reeds for the old steel versions. I guess the YZ reeds make better power and tend to be more reliable as well. As for the carbs, the reading I have done indicates that I could have gone with bigger carburetors and gained more power. This bike is for fun, it’s never going to race, and is in many ways an nod to the racers of the 50’s, 60’s, and 70’s. I’m not trying to rewrite the book here. I want the engine to produce power over a wide RPM range and to run reliably. I think this carburetor setup will do the trick. I’m confident that I will have to do some jetting work once the bike is assembled, but that’s a bridge I’ll cross when I actually get to it.
Moving away from the engine, I cleaned my fuel tank using electrolysis. I had read about various methods and electrolysis was by far the most elegant. It doesn’t require nasty chemicals like many other processes, but rather just some dish washing powder, a battery charger, and some electricity. I set the concoction up at John’s place and left it there to run.
Here’s how I set up the electrolysis, though there are plenty of DIY articles for this all over the web. I cut a piece of all-thread into two 10 inch lengths. These all thread rods represent the anodes (+) and the thank is the cathode (-). I drilled a block of wood so that the two pieces of all-thread would stick down through the filler hole aiming rearward slightly. It was important the they were oriented to avoid contact the steel tank (cathode). I then filled the tank with water and a dish washing power that contained sodium carbonate. Take your pick on the washing powder, sodium carbonate is what matters. My box cost $2.50 at Aldi’s. Then I connected my 12volt battery charger with the negative lead on the petcock and the positive on one of the pieces of all-thread. I used a short jumper wire to connect the two pieces of all thread together.
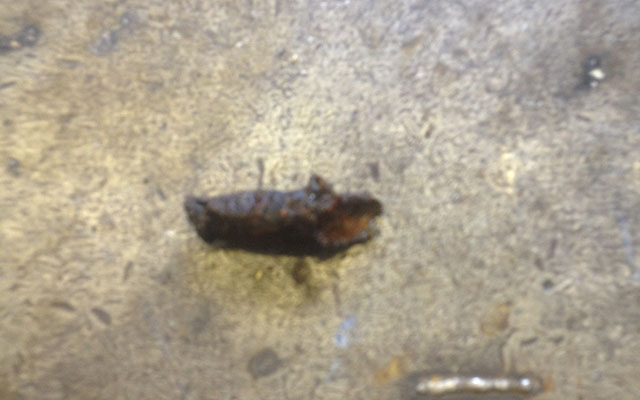
John sent me the photo of the anode after the electrolysis process ran for about two days. The tank came out pretty clean, though, in some locations a coating remains inside the tank. It looks like I’ll need to use a little aircraft paint stripper to get the remaining nastiness out. I thought it was pretty funny how little was left of the anode, especially considering that it was a 8 inch long 3/8 inch all-thread when it started. I ran the process three more times, and asides from the rubber coating, the metal is shiny and clean.
I have also started to dabble with stripping paint. It seems like the 40 year old paint isn’t hanging on too tight and a angle grinder with a wire wheel is doing a great job of removing it. The process is of course time consuming, especially to get each and every spec of paint off, but the product at the end is nice. There will however be many areas that the wire wheel can’t reach, and that’s where the aircraft paint stripper will come into play. The good news is that there are very few painted pieces on the project.
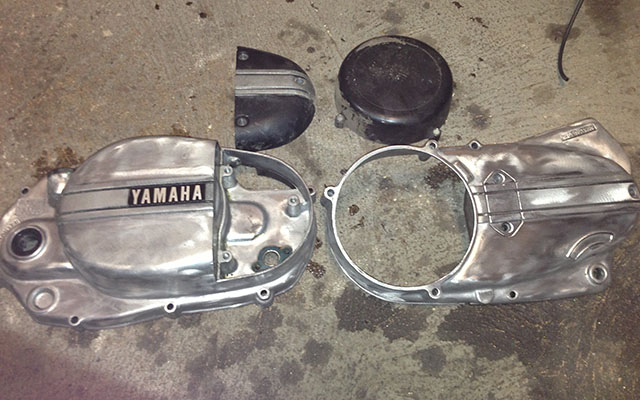
Check out this photo of my side covers. You can see that I have cleaned up the big covers and only have two small pieces left. Originally the plan was to leave all this stuff as is. Me being a busy-body I couldn’t leave them alone. I put the two remaining uncleaned covers in the photo for comparison. You can see on the generator cover (top right) that the paint was pretty much falling off in areas. On the oil pump cover (top left) you can see that the unpainted stripe is rather oxidized as well. To get the covers to this point I used a combination of a wire wheel on my angle grinder and the aircraft paint remover. The entire process took about 2 hours total, but now that I have a good process down it goes pretty fast. I’ll do the outer fork tubes and hubs in a similar manner.
I have gotten a few emails and comments asking for me to list the sources for my parts. So far this my parts list:
- RFY Shocks – eBay – New
- Transmission Bearings – 2StrokeWorld.com – New from individual
- Transmission Seals – 2StrokeWorld.com – New from individual
- TM28 Carbs/Reeds – 2StrokeWorld.com – Used/New from individual
- Main Bearings and Seals – 2StrokeWorld.com – New From individual
Next week I will have highlights from building the bottom end and transmission. I will also continue cleaning the frame, tanks, and various parts.
11 Responses
Maurizio Cheyne
I’m very interested in getting an RD 350 exactly like that and be willing to pay for a custom build,any help for guidance would be great.please advise I’ll be waiting with bated breath.
Chris
Hi Maurizio,
Thanks for commenting! The RD350 is a great bike to choose for any custom build! Depending on what part of the world you hail from, that can also impact your options. The first step would be got get a bike and preferably one that runs and has a title. After that the skies the limit. Feel free to ask all the questions you have.
Maurizio Cheyne
I’m sorry I don’t understand what that means ?,please clarify .
Maurizio Cheyne
I just got your message sorry for the confusion thank you very much
danush
Hi I would like to know the exact color of your bike. Please c can you tell me the code and paint used for the bike
Chris
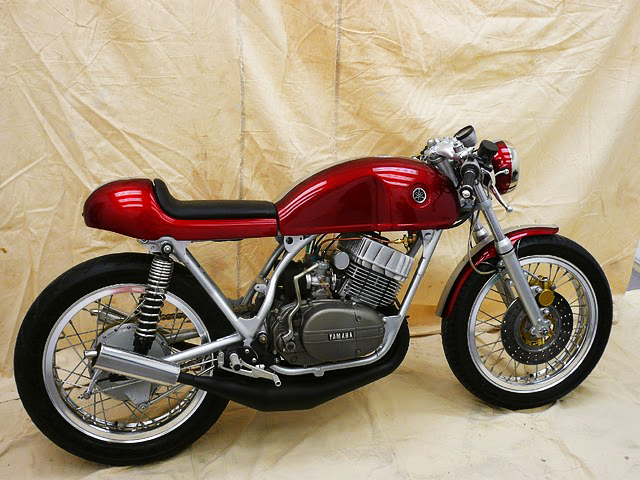
The bike is not yet painted. The red bike above is someone else’s bike.
danush
thanks chris . cant you give me the details of who’s bike is it buddy
Michael
Hey Chris, big fan of the blog, it’s helped a lot in my own RD work.
Question for you – I’ve seen it suggested that you should clean the outside of the engine very well before disassembling it in order to minimize dust/grime getting inside. Did you do this on yours? I’ve got the engine on my workbench and am eager to split it, but want to make sure I don’t miss a step I’ll regret later. Learning as I go 🙂
Thanks!
Chris
Hi Michael,
I think it’s a good thing to get the engine clean before a tear down. I cleaned mine three or four times before taking it apart, but there still remained a tough layer of grime on many of the external surfaces. Mine was awfully grimy…
Ideally, the insides of your engine are pretty clean, even if they do need a rebuild. When you take the engine apart there’s a good chance that you spread any dirt that’s on the outside of the engine onto your working space. This increases the chance that you will get dirt into the internals once they are no longer inside the engine. This necessitates then cleaning not only the exteriors of the engine but also the internals. So I suppose it’s really best to not only clean the engine before working but to also clean the work space religiously as well. Moreover, keeping things clean during the process not only saves time, but it also gives you peace of mind that things were assembled right.
Thanks for reading!
Chris
Michael
Thanks Chris. What did you use to clean things? I’ve heard everything from soap and water to specialized engine cleaning solvents.
Chris
I like to use mineral spirits for the oily substances. A light acid works great for cleaning aluminum parts.