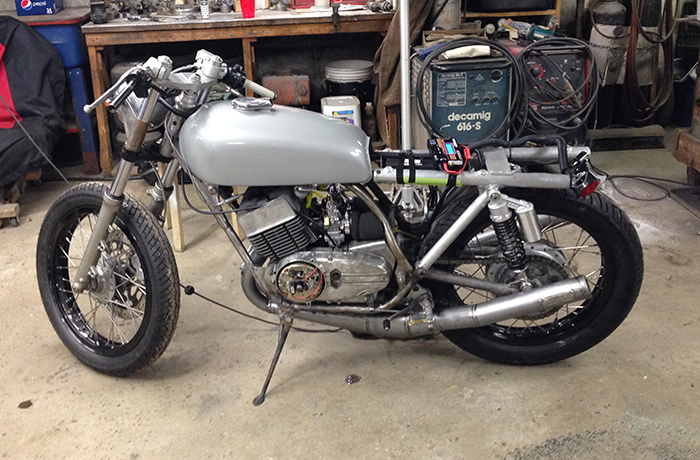
Over the last few months progress has been exciting despite what has been a distracted and busy summer for me. The list of items I have worked on is long yet the list of completed projects is small. This is when a project like this gets difficult. In the beginning it is easy to pick the low hanging fruit, but to finish you have to climb the tree.
At last post the bike was on wheels and was rolling. Now the bike isn’t just on it’s wheels, but it has brakes. Getting there was a tricky process. If you are familiar with these older bikes, then you know that a mechanical drum brake is common at the back. To get it working the rear-sets needed to be present. So I started with there. I had the rear-set pegs and foot controls that I bought from a parted out FZR600. They are a modern design and nice looking so I decided that I would modify them enough to make them work. For mounting purposes I cooked up tabs out of some scrap metal, trimmed them up nicely, and milled some reliefs in them. These were welded to the frame and the FZR600 rearset bolt directly to them. After this, my father and I then set out to fabricate an arm from the brake lever to actuate the rear drum. This was a simple process on the surface, but it took more than one try to get the geometry so that the brake was in proper operational range. Close attention had to be paid to make sure that the brake would work when the wheel was moved for chain tensioning. In addition to that, we had to mount the brake light switch. This switch simply activates the rear brake light when the brakes are applied. It required another bracket that my father cleverly made, unfortunately I forgot to get a photo. There are so many small details to completing a project like this.

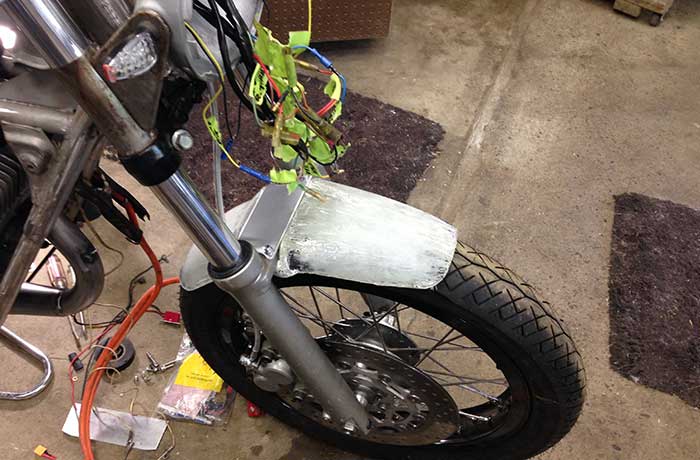
Getting the FZR600 forks mounted was fairly easy, but there remained several items to make a complete front end. The front fender is one of those, and it has been a lengthy process. Firstly, we wanted to narrow the fender to better match the skinny tires that this bike has. After that, we needed to shorten the fender, and round it off accordingly. It sounds like an easy thing to do, but considering that the fender serves as the nuts for the fork brace, we had to modify the fender while preserving the center section that mirrors the fork brace. Using his right angle grinder and a cutting wheel my father successfully made several cuts and adjustments to the fender. Then he reassembled the fender from the inside with fiberglass mat. Once this was done, the fender appeared functional from the top, but it was not particularly operational. Due to the fiberglass, which was required to fix the splices, the fender was not only thick but it was fairly heavy too. The fender also required ample body work to get a smooth top finish. Several options as to the final treatment were considered but ultimately I realized the best solution was to use the fender as a plug, thereby creating a mold for the layup of a fender proper. To summarize, I ended up making this into a lengthy and complicated process. Nonetheless, I did complete it.
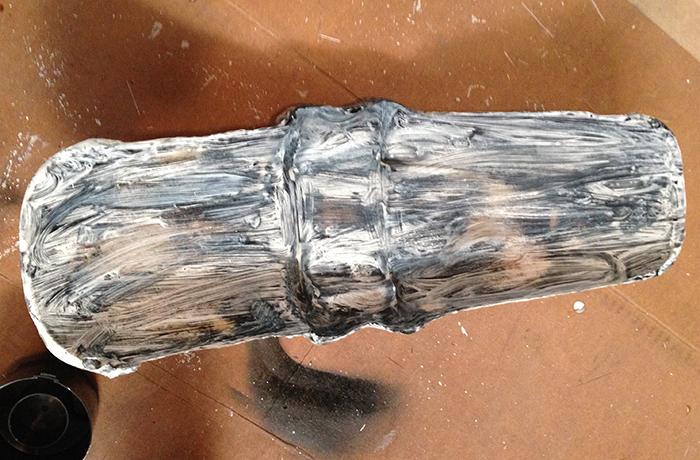
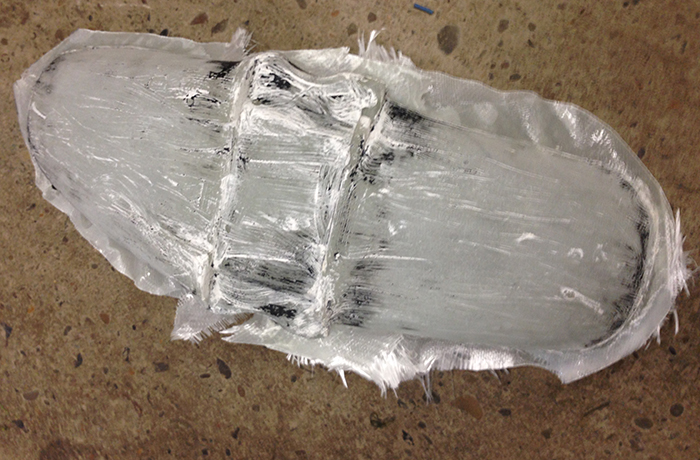
It took me one weeks worth of evenings to get the original into shape to pull the mold. Filling, primering, sanding, and repeat, that’s how the process goes, and it is not a speedy one. The surface finish turned out pretty nice, I’d give it a B+. From there I had to pull the mold. I coated the plug in several coats of wax, then sprayed it down heavily with hairspray. Yes, you read that right. Hairspray deposits a thin films of plastic on the surface that easily releases from the wax when separating the pieces. The hairspray is also easily removed by washing in water. Other products do this, but they are typically several times the cost of dollar store hairspray. After fully hair-sprayed and waxed I started the layup. I wanted the part to be rigid but light. At the attachment points I needed it to be very rigid, but at the ends there no real load bearing requirements so they could be light. I started with bi-directional cloth at the attachment points then laid up uni-directional cloth the length of the fender. I repeated this process until I achieved 5 plies the length of the fender and ten plies at the attachment point, though I performed the lay up in several steps.
Also on the front end, the brake rotor mounting needed to be sorted out. Ultimately I want to create a mounting adapter that is more robust and frankly properly engineered. For now though I needed an interim solution. Mainly, I didn’t want to spend hours machining a perfect spacer that wasn’t going to work correctly as a result of some other unforeseen problem. That lead me to build individual spacers for each bolt. I knew I could cut the blanks quickly on the lathe, I had the material immediately on hand, and finishing only required about 10 minutes of milling per spacer. All in all, I ended up with 6 nice spacers and about two hours of time invested. As a result, the rotor is mounted to the front wheel. With that completed it was time to finish the rest of the brake components. Step one, find a master cylinder. I ended up with a use dYamaha YFM350 master. It was cheap, costing $20 shipped, and it was the right piston size. Step two, get a brake line. I started sourcing the fittings and line, it looked like a $35 dollar job to be done right. I found a guy on the web who builds it for you for $35 shipped. I went that route. The line turned out beautifully. The brake bled up immediately, feel is very good, and overall the preliminary brake setup is good to go.
The next post will feature the electricals on the bike. For once I am further ahead on the bike than I am on the blogs, so updates should come rapidly now.
Leave a Reply