People who know me well know that I’ve always enjoyed social experiments.
Sometimes that means making something that simply piques someone’s interest. Other times it means creating confusion, laughter, curiosity, or some combination of all three. I like making things that get a reaction out of people—something unexpected enough that they stop, look at it for a second, and try to figure out what exactly is going on.
This project started with that idea and a working name: Bubbletron.
The name stuck through the initial design, troubleshooting, and first trip to Summerdance. Along the way, though, the project developed into an integrated system of LED visuals, portable power, custom structure, and pushbutton bubble effects. That underlying technology now has a name of its own: Bubbletronic™ by CL MotoTech. The machine described here is the first generation of the CL MotoTech Bubbletronic™ Display System.
But it began with a fairly simple ambition.
I wanted to take LED display technology, remove it from the wall, make it portable, add an interactive element, and turn the whole thing into a piece of moving festival art.
The target was Summerdance.
It needed to move through the crowd, play strange animated artwork, shoot bubbles on command, and generally add a little more spectacle to an event that already has plenty of it.
So I set out to build it.
The Real Engineering Challenge
Getting an LED panel to display an image is not especially exotic. The challenge was making the entire system self-contained and usable in the field.
A normal LED sign assumes there is a wall outlet somewhere nearby. This machine could not.
Everything had to operate from a portable 12-volt battery system, while the various components themselves required different voltages.
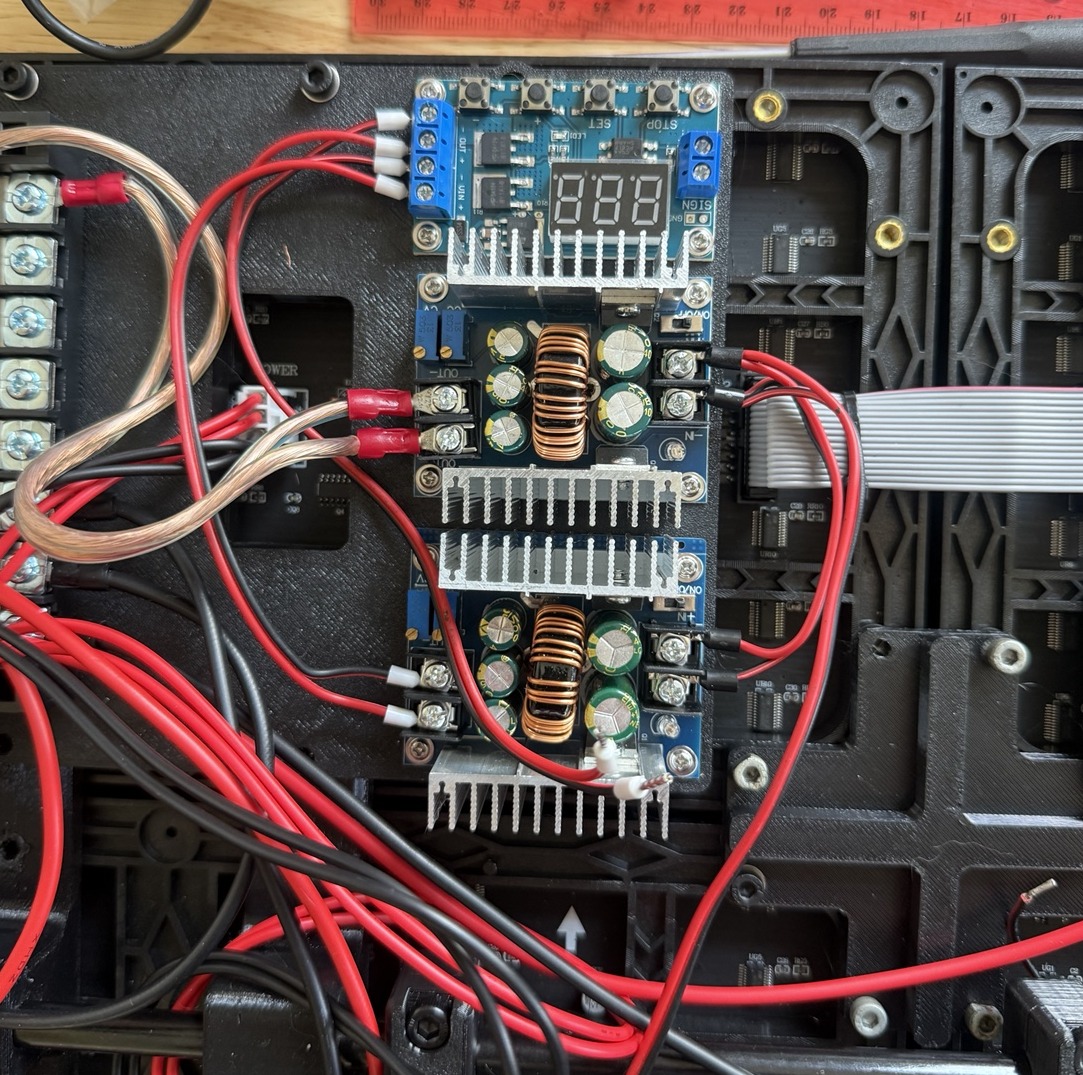
The LED display and controller operate from 5 volts. The bubble blower motors operate from approximately 3 volts. That meant designing a 12V electrical system capable of supplying both voltage rails while remaining compact enough to carry around.
On top of that, the system needed to include the LED controller, power conversion hardware, distribution wiring, bubble controls, timer, relay, and eight individual bubble blowers.
All of it had to work while being carried through a festival.
That became the real project.
The sign was just one component of a larger portable machine. Getting those components to work together became the foundation of the Bubbletronic display system.
The Display
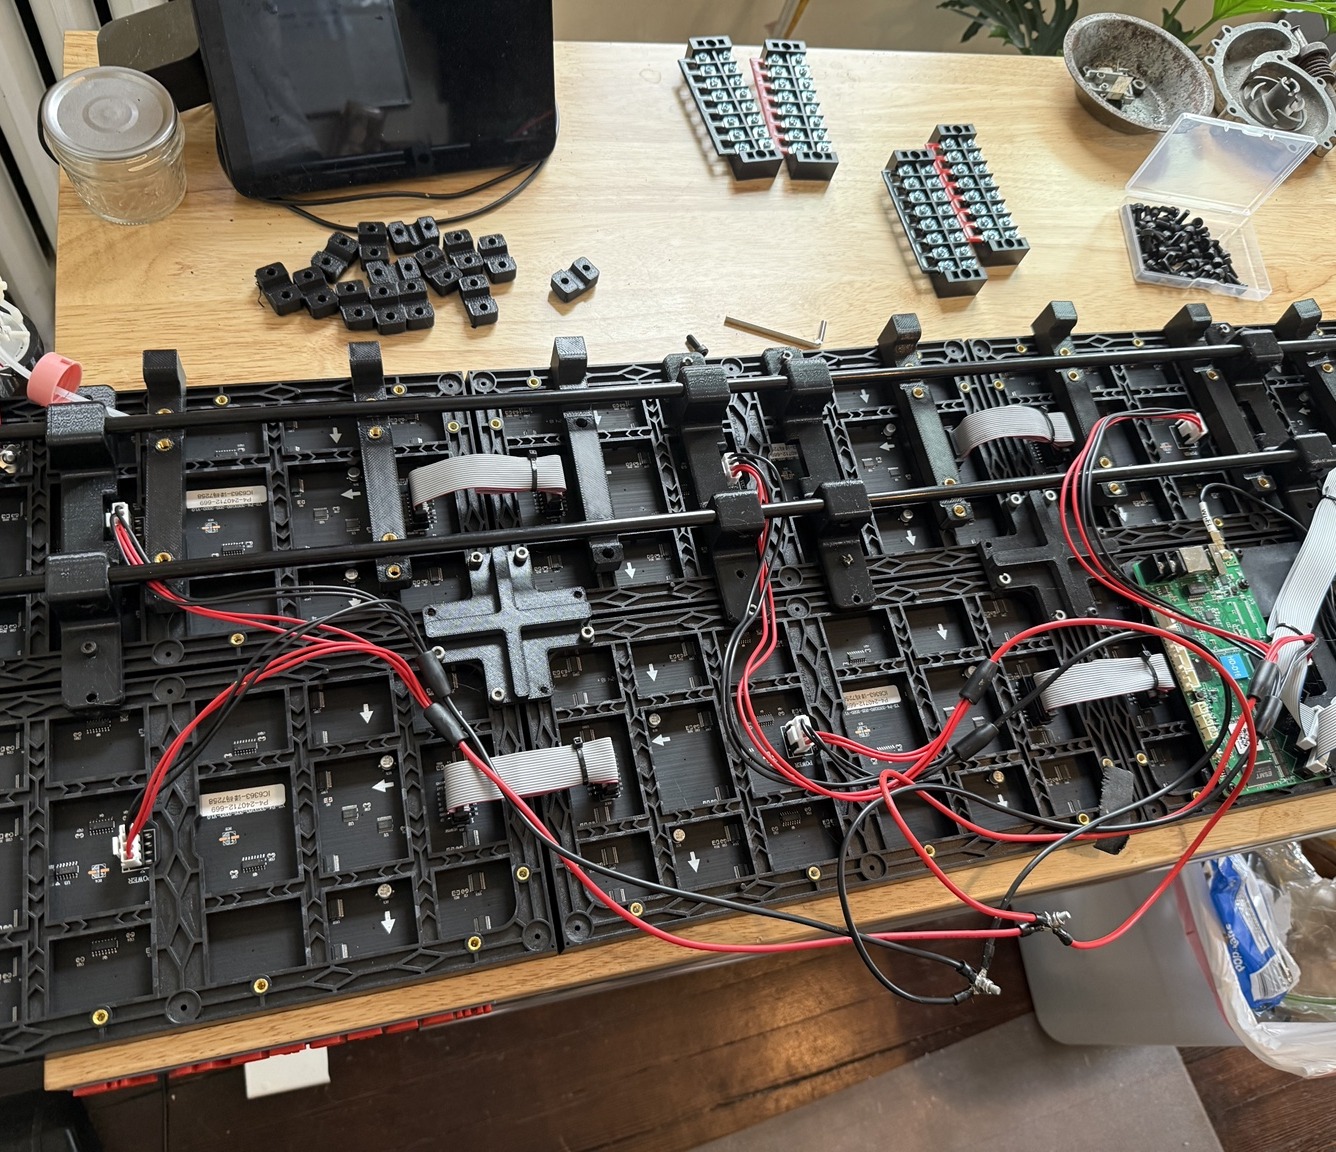
The display is built from P4 LED matrix panels controlled by a Huidu HD-D16 LED controller.
One of the questions I heard repeatedly at Summerdance was:
“Is that running on a Raspberry Pi?”
No.
Another common guess was Arduino.
Also no.
The HD-D16 is a dedicated LED sign controller. It stores and plays the video content directly, which made it a much better fit for this application than adding a general-purpose computer simply because I could.
The finished display consists of eight panels arranged in a wide format, producing a 240 × 80 pixel canvas.
That is not a tremendous amount of resolution compared with a television or computer monitor, but that is part of what makes designing artwork for it interesting. Images have to be bold. Motion matters more than detail. Bright shapes, recognizable objects, high contrast, fractals, tunnels, faces, eyes, geometric patterns, and surreal imagery all work particularly well.
Some of the visuals became intentionally confusing.
An image might begin with something clearly recognizable and slowly dissolve into a neon tunnel or fractal landscape. Faces appear and disappear. Eyes form out of geometry. Apples become futuristic cities.
The lower resolution actually contributes to the effect because your brain fills in some of the missing information.
It became less about displaying a video and more about creating something people could get lost looking at.
Getting the Panels Working
The display system was probably the most frustrating part of the entire build.
There were controller failures, questionable panel compatibility, firmware changes, driver IC settings, scan configurations, and a lot of time spent staring at LEDs that were doing absolutely the wrong thing.
At one point I was reasonably convinced that an entire batch of panels had been damaged.
Eventually, after replacing panels and working directly with the supplier, I was provided with the correct FPGA firmware and an .ssr configuration file for the new modules.
Even that had a trick to it.
The configuration file had to be placed into a ZIP archive before the software would import it correctly.
Once that was loaded, I reran Huidu’s Smart Settings process. During the trace procedure, the software had me identify the pixel path point-by-point until it reached 20 pixels vertically. At that point it recognized the scan pattern, completed the trace automatically, and generated the correct configuration.
I opened HDPlayer, sent a test video, and suddenly the entire panel worked.
There were a few celebratory words at that point that probably do not belong in a technical article.
Designing the Structure
Once I had control of the display, the mechanical design became much easier to define.
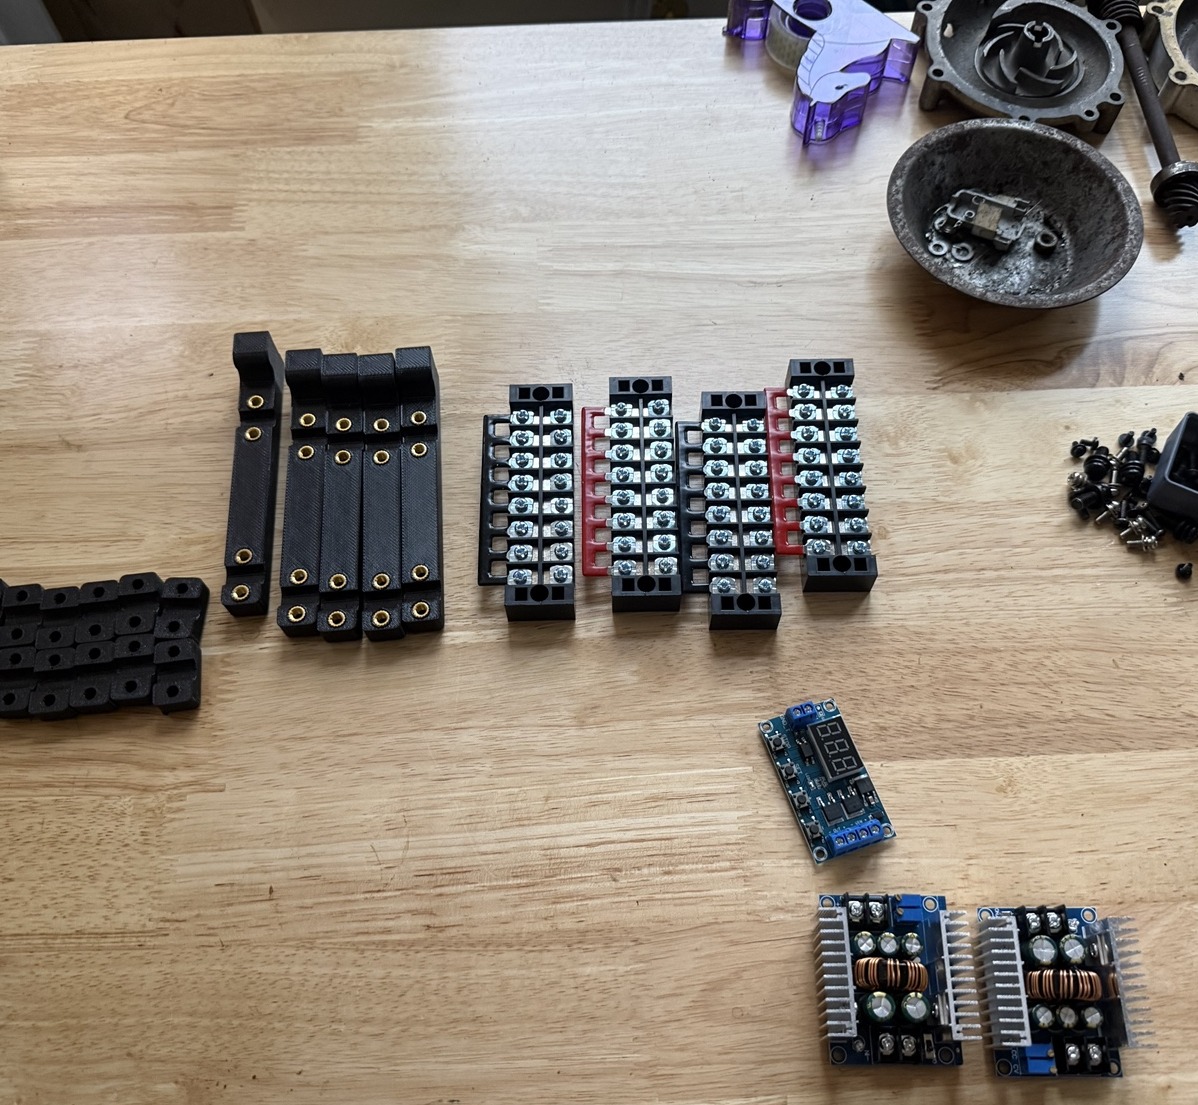
Most of the structure and component mounting was designed in Fusion 360, with custom parts produced on a 3D printer.
This was one area of the project that worked particularly well.
Instead of mounting electronics wherever they happened to fit, I built brackets and mounting features specifically around the components. The LED controller, power converters, timer, relay, distribution hardware, and related electronics all had dedicated locations.
That turned out to be important because the original Bubbletron build went through a lot of development.
Controllers were changed. Panels were swapped. Wiring was revised. Components had to come out and go back in.
By the time I moved the entire electronics package onto the final set of panels, the attention to fit and finish had paid off in a very practical way: the machine was easy to work on.
That may not sound exciting, but anyone who has built experimental hardware knows how valuable serviceability becomes by version three, four, or five of an idea.
It also gave the evolving system a structure I could continue developing, with components mounted deliberately and room to revise the design.
The Bubble System
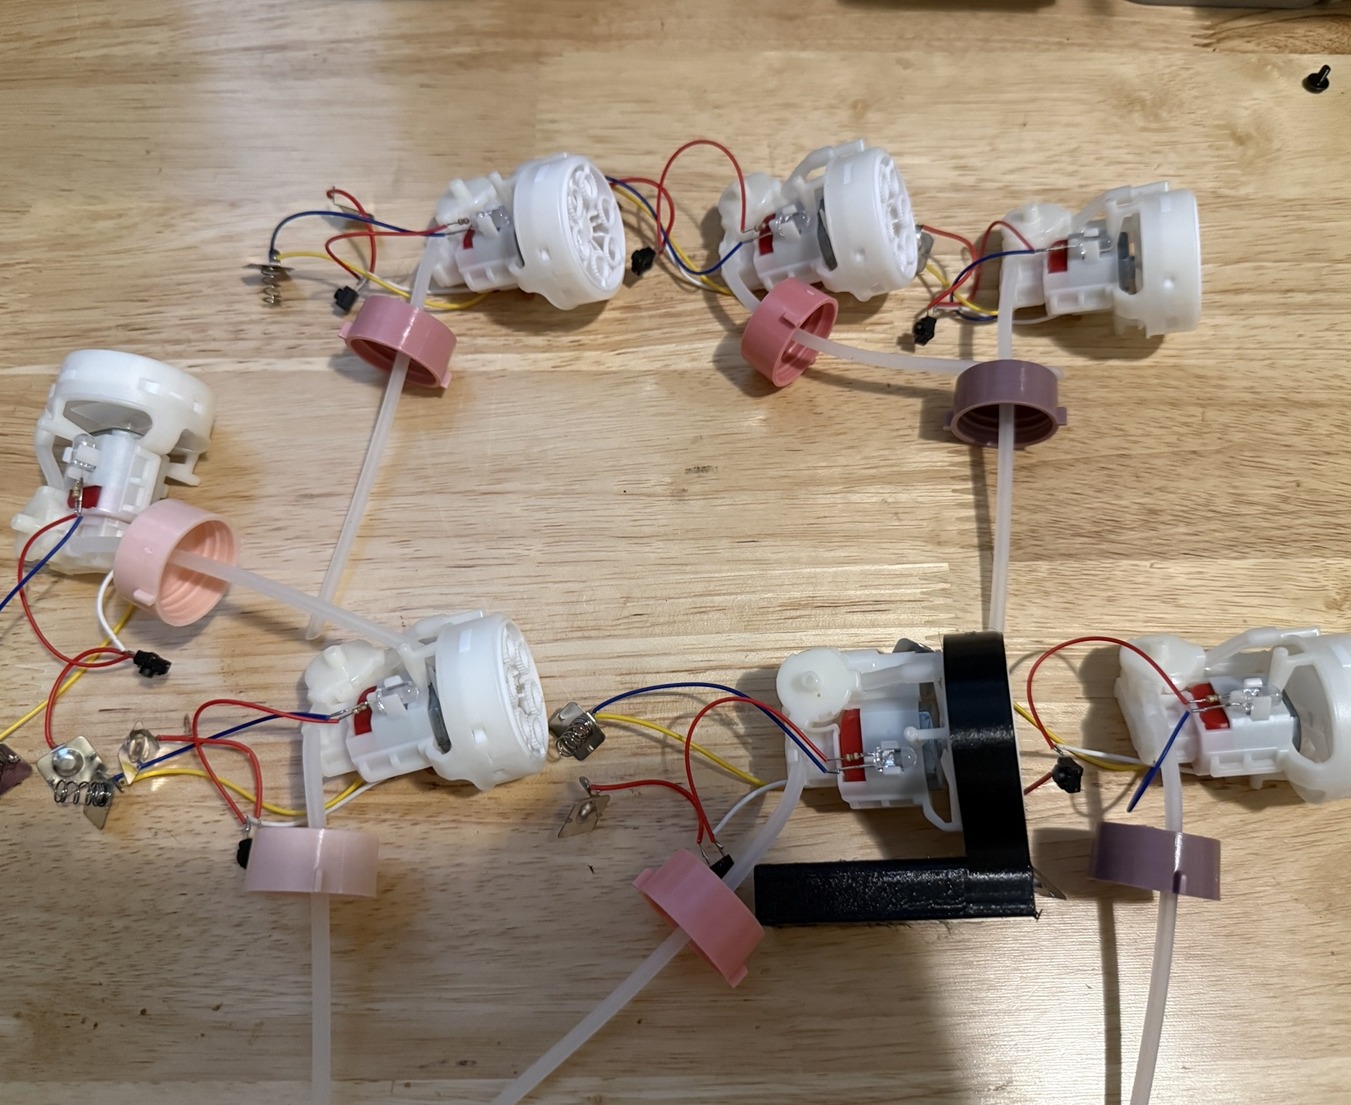
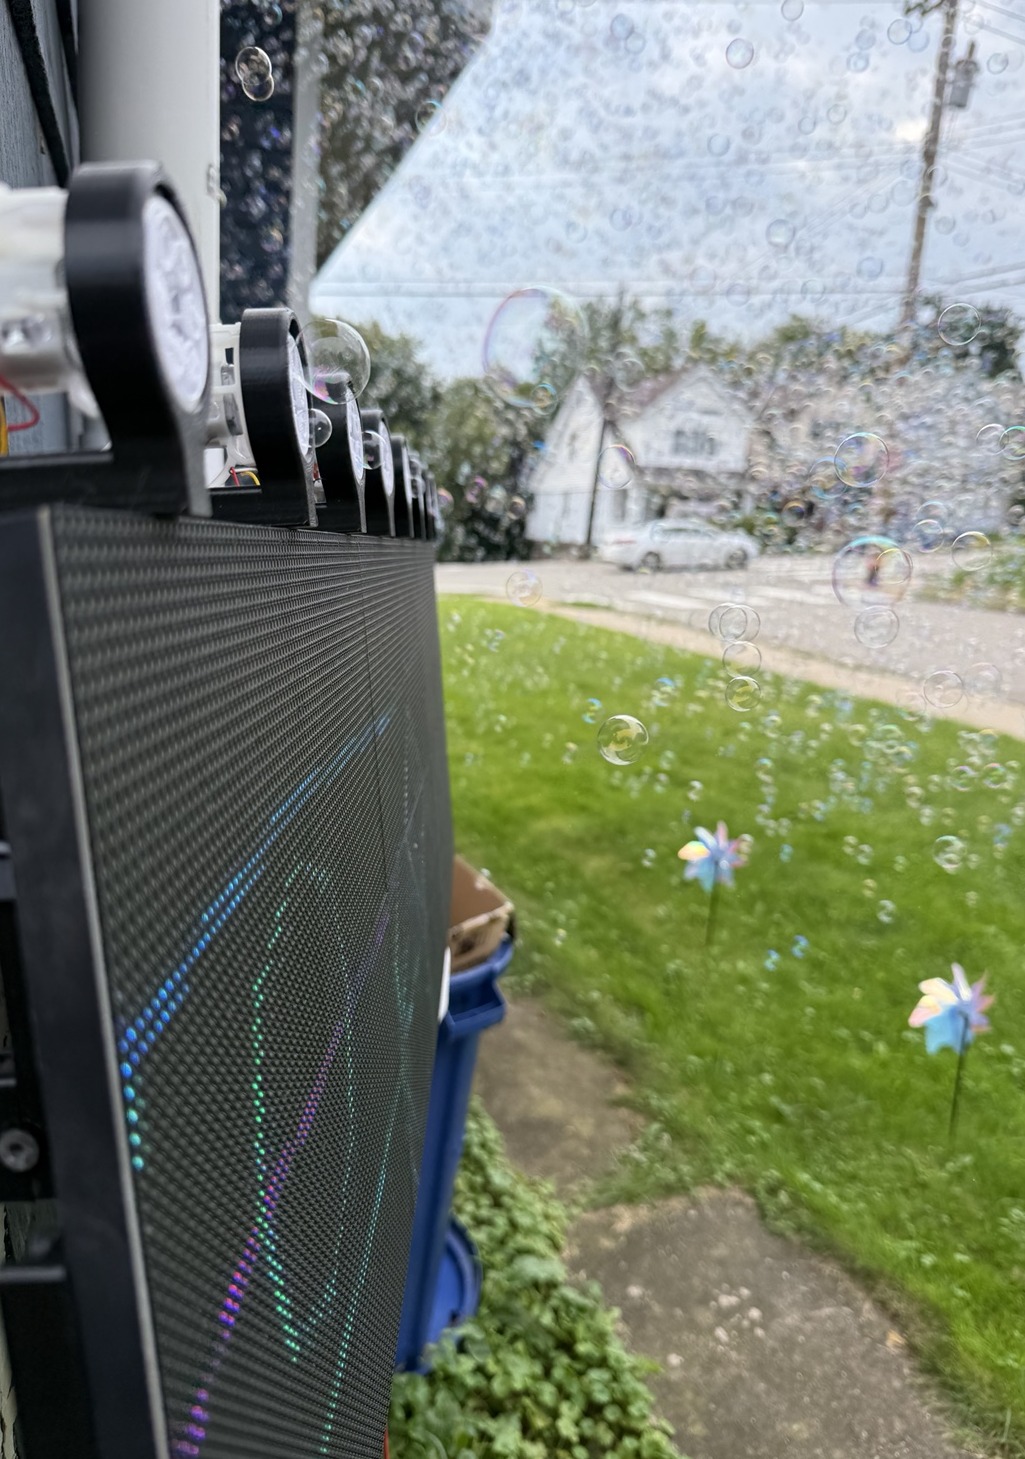
The interactive part of the Bubbletronic display system comes from eight bubble blowers.
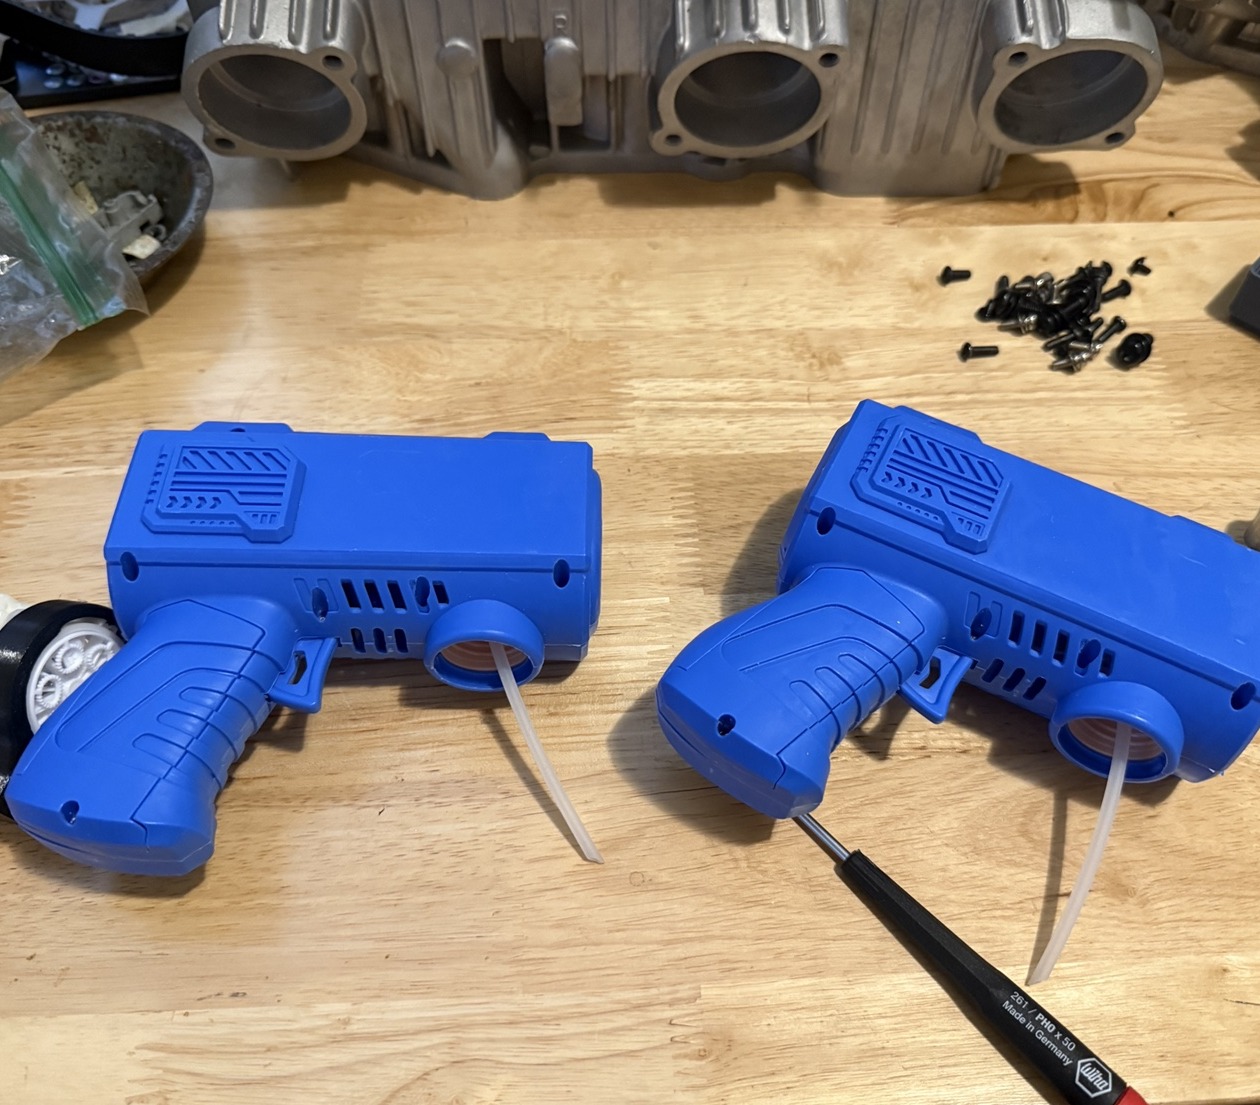
The original blower mechanisms came from inexpensive battery-powered bubble guns. I removed the mechanisms from their original housings and designed new frames to integrate them into the display assembly.
All eight motors run from a common 3V system.
A pushbutton triggers a timer circuit, which activates a relay and runs the blowers for a predetermined period before shutting them off automatically.
The idea was that I should not have to hold a switch down or think very much about operating it while carrying the sign.
Push the button and bubbles happen.
Then it shuts itself off.
That simple interaction ended up being one of the things people responded to most.
Power Consumption
One of the pleasant surprises was how little power the finished system actually needed. With the LED sign playing normally, I typically saw around 15 watts, and rarely more than about 20 watts.
With the screen running and all eight bubble blowers operating simultaneously, total consumption was about 37 watts.
That made the portable power problem much easier than originally expected. A reasonably sized 12V lithium battery could comfortably power the system through a concert without requiring a huge battery pack.
The power architecture ultimately became:
- 12V battery source
- Regulated 5V supply for the LED system and controls
- Regulated 3V supply for the bubble blowers
That was really the heart of making the whole thing work away from a wall outlet.
The Artwork
Once the hardware became reliable enough to use, the artwork became its own project.
By Summerdance, the machine had accumulated more than an hour of animated content.
Some pieces were geometric and abstract. Others used recognizable objects that gradually became something else entirely.
There were neon tubes, cosmic flowers, fractal tunnels, hidden faces, eyes, psychedelic landscapes, retro arcade imagery, mandalas, and a surprisingly deep philosophical exploration of Trader Joe’s Apple Chip Duos.
That last one requires some explanation.
Apple Chip Duos contain two kinds of apples. Duos. Duality.
My friends and I have spent an unreasonable amount of time discussing the larger philosophical implications of this. Naturally, this resulted in several videos where red and green apples dissolve into impossible futuristic worlds.
Art is subjective and, at least in my opinion, doesn’t need to make sense or have an explanation.
The artwork is also part of what makes Bubbletronic feel like a useful name for the technology. The electronics, moving imagery, and bubbles all contribute to the experience. Developing the visuals became as much a part of the project as designing another bracket or sorting out the wiring.
Bubbletron Goes to Summerdance
Eventually the project had to stop being a bench experiment and actually go outside.
Still going by its working name, Bubbletron made it through Summerdance.
And it was a hit.
People stopped me constantly to ask questions.
What controller are you using?
How is it powered?
What kind of LED panels are those?
Did you design the frame?
How long did it take?
How much did it cost?
Is it Arduino?
Is it Raspberry Pi?
Where are the bubbles coming from?
That was probably the best validation of the original idea.
The goal was to create something that caused people to react.
Some people laughed.
Some stared at it.
Some wanted to know exactly how it worked.
Some probably wondered why somebody was walking through the festival carrying a glowing machine that periodically fired bubbles into the crowd.
All of those reactions count. The first Bubbletronic display system did what it was supposed to do!
Lessons From Version One
The first real-world outing also exposed several things that need improvement.
The support pole worked, but it needs to be easier to assemble and somewhat stiffer than the approximately 0.7-inch OD electrical conduit used in the first version.
There is also an intermittent electrical issue associated with the bubble trigger. Occasionally pressing the bubble button causes enough disturbance on the 5V system that the HD-D16 restarts. That needs to be isolated and corrected.
The bubble solution supply itself also needs work. Eight blowers can consume bubble solution quickly, and managing smaller individual supplies is not ideal. The next version will likely use one larger common reservoir feeding all of the blowers.
And now that the display is working, the artwork can be designed much more intentionally around its physical format.
Those are the next development problems. They are very different from staring at a panel and wondering whether the machine is going to work at all.
The First Generation
Bubbletron began as an experiment at the CL MotoTech design studio. The objective was to take fairly ordinary LED display technology and engineer it into something portable, interactive, strange, and appropriate for a music festival.
That required mechanical design, electronics, power conversion, fabrication, 3D printing, software configuration, animation work, troubleshooting, and a fair amount of stubbornness.
The result became a moving piece of interactive art.
That progression is what the Bubbletronic™ name represents. Bubbletron was the initial project name. The CL MotoTech Bubbletronic™ Display System is the identity for the integrated technology that grew out of it, and for the development that comes next.
The first generation has already been out in the wild. It survived.
It made bubbles. It played psychedelic nonsense for hours. And most importantly, it made people stop, laugh, stare, ask questions, and interact with it.
For a social experiment disguised as an engineering project, that seems like a pretty successful first generation.
What Comes Next
The Bubbletronic display system is not finished. The first festival outing proved that the core idea works, but it also made clear where the design can be refined. The structure, pole system, bubble supply, electrical isolation, and artwork can all be improved as the project evolves.
There is also a possibility that it becomes something other people can build or buy.
That could take several forms. I may eventually offer a complete assembled unit, a kit, or release or sell the 3D-printable bracket and frame files so someone else can build their own version around the same basic architecture.
For now, though, the focus is on continuing to develop the design and making the next version better than the first.
The original Bubbletron project proved the concept. Now the CL MotoTech Bubbletronic™ Display System gets to evolve.
Happy Summerdance! See you all next year!
The machine will make appearances at other shows and festivals in the next year as well, so come by and push the button!
Leave a Reply