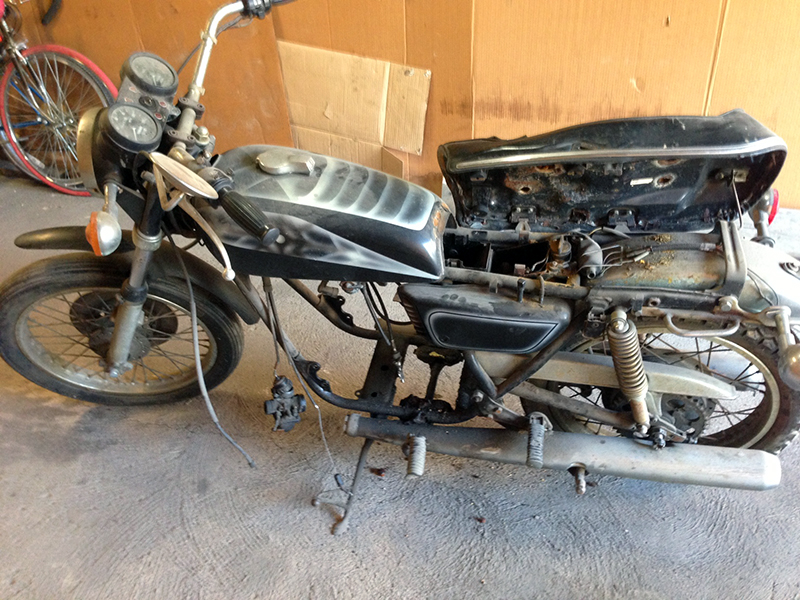
This past weekend, as planned, I picked up my RD350 from my father. I’m sure he’s glad to be rid of it, as it will free up another 15 square feet of floor space in his garage. I wish I could have gotten my KX80 as well, but my one car garage is already challenged by the bicycles and Scion XB that are regularly parked in there. As stated before, I am a two-stroke fanatic, and in many ways miss the days of the 500cc Grand Prix bikes that were phased out in 2002. This RD is in many ways a predecessor to that golden age of Grand Prix racing where two-cycle engines were the dominant force. This is just one reason why I am so excited for this project.
My father and I had taken the cylinders off of the bottom-end of the engine a few years back. We just wanted to assess the condition of the engine. Once we had removed the cylinders it was obvious that both cylinders needed honed and pistons purchased to suit. For many reasons, the bike just sat from there until I resurrected this project recently. Unfortunately, the bike got basically no attention during this time. My father had several ongoing projects in his garage over that past 9 years and as a result the bike is downright filthy. Not only is it greasy, I assume from it’s own two-cycle nature, it is also covered in nearly a decades worth of grinding dust.
Before doing too much to the bike it really needs a cleaning. Plain and simple, it sucks working on anything that is filthy, and currently this specimen is a real pig in shit. Before I could take the bike to the car wash to hose it down, I would need to take the engine out of it. Since the cylinders are off the bottom-end, there is really no way of protecting the main bearings and bottom rod bearings from the punishment of the pressure washer.
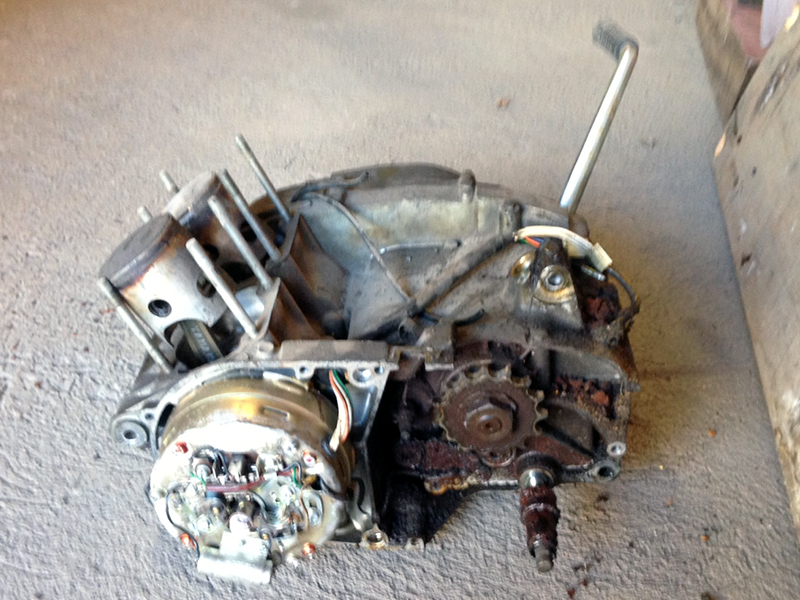
Luckily, removing the engine was easy. I started by taking the side covers off both the left and right side of the engine. This gave me access to the various cables that are connected to the engine such as the clutch cable. One bonus of having the cylinders and heads off was that there was no need to remove the gas tank to get the engine out of the frame. Once I unhooked the speedometer cable from the transmission I then found the master-link on the chain and removed it. After that I hosed down the four bolts that hold down the engine in the frame with WD-40. It was an easy task to break those nuts free. I used a long Allen driver to push the long bolts out of the engine and frame. I found the oil line from the oil tank and detached it from the oil pump. This is located in the front right side cover of the engine. Surprisingly, the oil in the oil tank looks and smells good. I wouldn’t dare run it, but I bet it it remains in good enough condition to work. To get the engine out I hit the case with a wood block with only slight force. The engine immediately broke free and I lifted the engine and transmission out by hand. The entire process took about an hour. If I had any experience working on an RD350 I bet I could have gotten the engine out in a half hour. Working on the bike is also a painful reminder of how laborious race car maintenance is in relation.
The good news is that the bottom end spins freely and smoothly. There doesn’t appear to be any rust on the bottom end and I may not even take it apart. However, I will have to take the crankcase apart and change the main bearing seals. Considering the engine is already 35% of the way apart, there is no point in stopping now. My father owns a hone and bath and has the proper stones so that we can hone the cylinders in house. This will be a nice money saver for the project and adds another bit of character to my build. My father also has a bore gauge, so once we clean the cylinders up a bit I will better be able to judge what size pistons to source. I have to decide if I am going to purchase stock Yamaha pistons or if I will go for something more performance oriented such as a Banshee piston. I will have to do some research to decide. Moreover, I do have plans for a mild port job on the engine, this will likely go hand-in-hand with my piston choice.
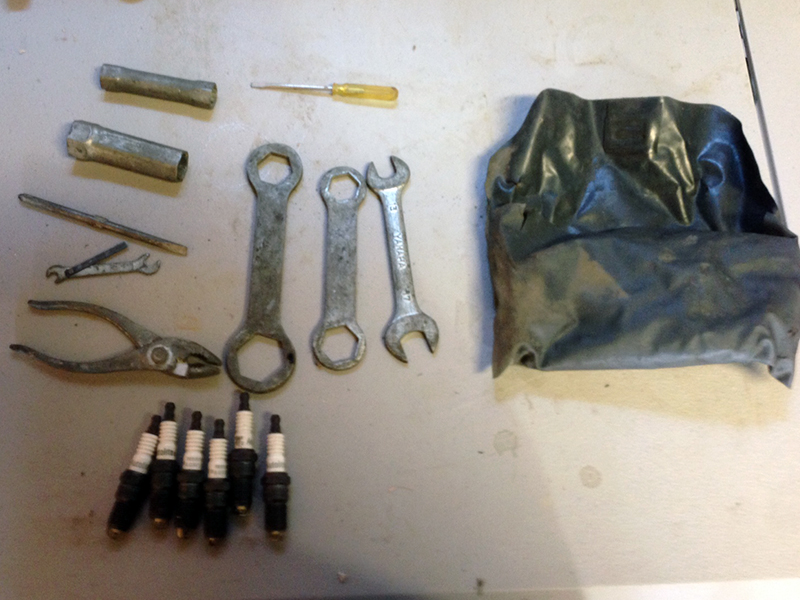
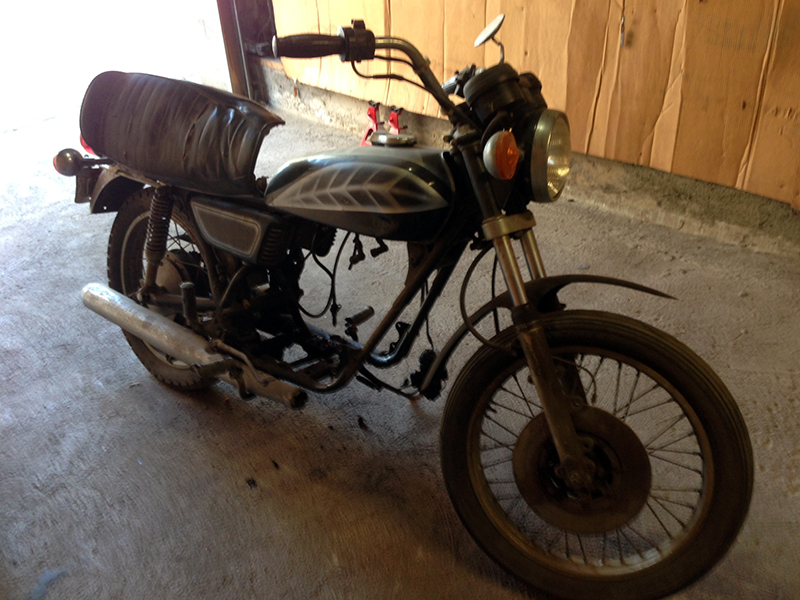
One of the more interesting finds during my tear down was the tool kit. The tool kit was housed in the vinyl bag in the little storage area beneath the seat. As you can see in the pictures, the seat is in really poor shape and will simply be discarded. The tool kit however is priceless. It had an assortment of spanners that I suspect all came with the bike. Additionally, there was a huge assortment of spark plugs. The engine must have fouled a few plugs in it’s day. There is no other reason for there being six plugs in the kit when the bike only requires two for operation. The stock carburetors likely need to be jetted if it fouled plugs at this rate. Unfortunately, the carbs are in pretty shabby shape. One of the two seems to slide properly while the other is seized. I plan to clean them up a bit and check them out, but I’ll likely purchase an after market set that will provide a performance gain nevertheless.
Next up, I will wash the bike and then continue to tear it down. Some parts will be discarded completely, others will be cleaned, repaired, and refinished. I’m also going to get my high quality photography equipment setup so that I can provide better photos as this project progresses. Stay tuned.
Leave a Reply