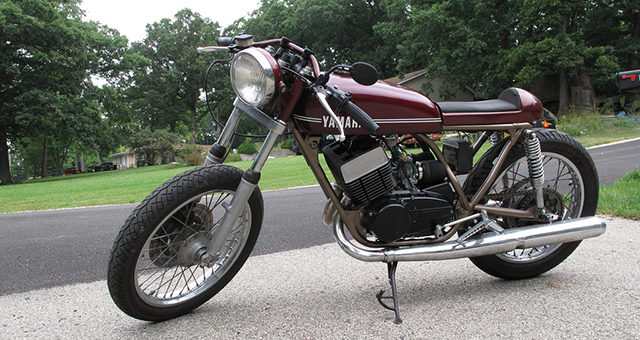
This last week I went on a crusade of the motorcycle variety to round up some of the components I haven’t paid much attention to. I started with the wheels
The plan is to replace the old steel wheels with aluminum rims and throw in stainless spokes as well. Aluminum wheels are lighter and will be a huge improvement. Not only will they replace rusty wheels, they will reduce rotating mass, lower unsprung weight, and bring down the bikes overall weight. All great improvements to this bike. To disassemble the wheels I had to first remove the tires.
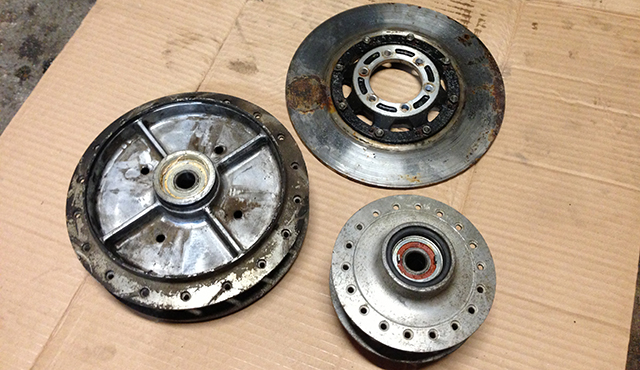
I have my fair share of tire changing experience. I can do a set of racing kart tires by hand in under ten minutes without breaking a sweat. I have also done my car tires, both racing and commuter, on a manual tire machine handily. That said, 20 year-old motorcycle tires comprised of material that no longer represents rubber are a major bitch to remove. I did it by myself using two large pry bars, two large screw drivers, and a C-clamp. I jog regularly, bicycle often, but not recently have I been put through such a rigorous work out. I seriously contemplated cutting the rear tire off, but finally got it. Once the tires were off it was simply a matter of applying some WD-40 liberally to each spoke nipple, letting them soak for a few minutes, then removing the nipples with a straight blade screw driver attachment in my battery drill. It took about five minutes a wheel. Removing those tires was easily the toughest part of this motorcycle project thus far. That made it satisfying as well. Now that the rims and spokes are off the hub I can get down to cleaning the hubs thoroughly.
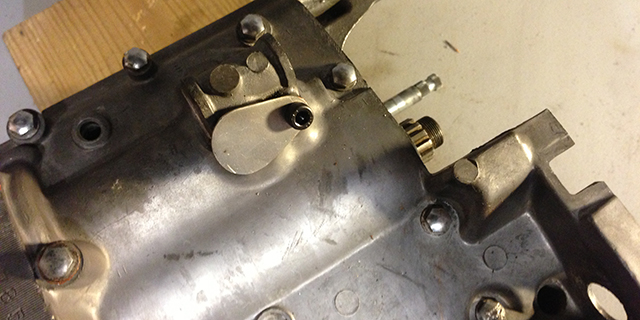
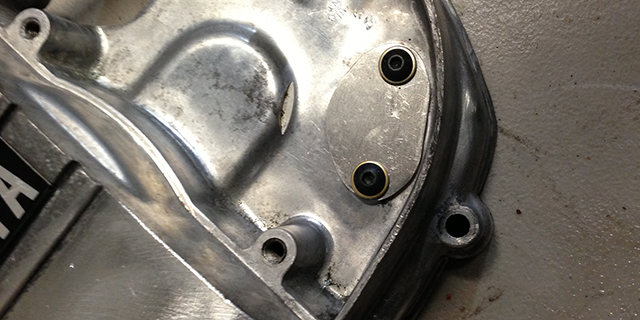
At the John Walko Racing shop I got the chance to fabricate the aluminum block off plates that I need to complete my engine. Yes, just when I thought that little engine was nearly done I realized that there were several large holes by which fluid would leak directly out of the engine. The cause of these potential leaks? I eliminated the neutral position sensor, RPM worm drive, RPM cable, and the oil pump. I like to simplify things. To remedy these leaks I fashioned covers out of aluminum sheet metal. I eyeballed each hole carefully and slowly trimmed aluminum sheet metal with hand sheers until each panel was pretty close to the appropriate size. Using a bench top belt sander I rounded and tailored each panel further. Once I got the panels to their final shape I then drilled the hole or holes that are used to mount the panels. To finish each panel, I filed the edges smooth making sure to eliminate all burrs. Mounting the panels just required some RTV sealant and bolting them on. Creating the four cover panels took about an hour (I feel like I’ve been saying that a lot lately). They aren’t the fanciest panels, but they are functional. I know CNC machined panels exist, and I’m sure those panels are prettier, but why over engineer?
The final bit of work I accomplished was on the forks. I hadn’t yet taken them apart and was eager to see what was inside. I am going to install fork cartridge emulators as well as new fork tubes and seals. I guess you would call that a complete rebuild. For those who are not familiar with fork cartridge emulators Race Tech has a great guide. Suffice it to say, they give old forks improved performance and added adjustment. All things that I like to hear. The forks aren’t much to look at asides from a pile of parts thus far, so I refrained from taking any photos, but here’s how I did it.
I found some instructions on the web for fork disassembly and got to work. Each fork tube cap removed easily. The biggest problem was getting the bolt out of the damper rod. This is the bolt at the bottom of the fork. I needed an impact gun so I took the forks to John’s shop. There I used his 3/8″ drive impact gun and it made short work of damper rod bolts. I then removed the various clips and the forks were mostly disassembled. All that was left was to remove the fork seals. Lot’s of guys report troubles removing the fork seals but my process was simple. I clamped a medium sized lady slipper vertically in the vice with the hook oriented at the top. I hooked the seal on the lady slipper and hit upwards on the fork tube with a rubber mallet. The seal popped out instantly. The interior bushings and various pieces are in great condition. There is very little visible wear. I hope to order the fork tubes and emulators soon. Once I have all the parts expect full post on just suspension. Even though they are new, I will be rebuilding the Chinese rear shocks at the same time. I will be enlisting the much talked about John Walko for a proper build those coil overs.
There are a few updates on parts and pieces. I received the fork seals and fork oil leaving me in need of just the new fork tubes and emulators to complete the front suspension. I also got my 11-dollar clutch in the mail. It’s surprisingly nice. In fact, the basket shows less wear than my old basket and I thought the old one was rather nice. That was certainly a win. I also got my gasket kit. I can now assemble the clutch and right side case completely. I got a set of DG expansion chambers new on eBay for 250-dollars with shipping included. At around 50-dollars less than retail I think I did pretty well. A host of little stuff showed up as well, check the parts roundup for that.
Next week, the grind continues. I’ll be cleaning hubs, the frame, and button up the engine/transmission cases. Make sure to stay tuned and don’t hesitate to comment or post questions below.
This weeks parts roundup:
- Fork Seals – Economy Cycle – New
- Maxima Fork Oil (15w) – Economy Cycle – New
- Maxima Transmission Oil for Wet Clutch – Economy Cycle – New
- Front Drive Sprocket – Economy Cycle – New
- 430 Chain – Economy Cycle – New
- DG Expansion Chambers – eBay – New
One Response
Jim March
You need to stabilize the front end. I have a lot of stick time on RD350s and that front is not stable enough, esp. since you took the stock steel front fender off that was acting as a half-assed fork brace. You need a real fork brace or better yet, swap the whole front end out with something with much thicker fork tubes.
What you have there is going to headshake like a motherbleeper in the wrong corner.